Full Sleeve Tattoos
Before we put needle to skin, we’ll start with the big three:
-
Placement (Arm, Leg, etc)
-
Style
-
Color or Black & Grey
Think of it like building your character in a game—you choose where it goes (placement), what vibe it gives off (style), and whether you want it full of vibrant color or in the timeless shades of black and grey.
How long will it take?
Every tattoo has its own journey—no two follow the exact same questline. The style, amount of detail, whether we’re going bold with color or sticking to black and grey, and even how your skin heals all affect how long the adventure takes.
The diagram below is like a map for how I usually break a full sleeve into sections. For multi-day projects, I like to start at the top and work my way down—kind of like clearing levels in order—so healing is smoother, layering works better, and the design flows naturally.
In this example, the sleeve is divided into 7 sections. The first six are the main stages of the build, and the last one is the “final boss” where we tackle finishing touches, polish details, and revisit any spots that need extra attention.
This approach keeps the piece cohesive, gives each stage time to heal, and helps your skin make it through the process without taking too much damage.

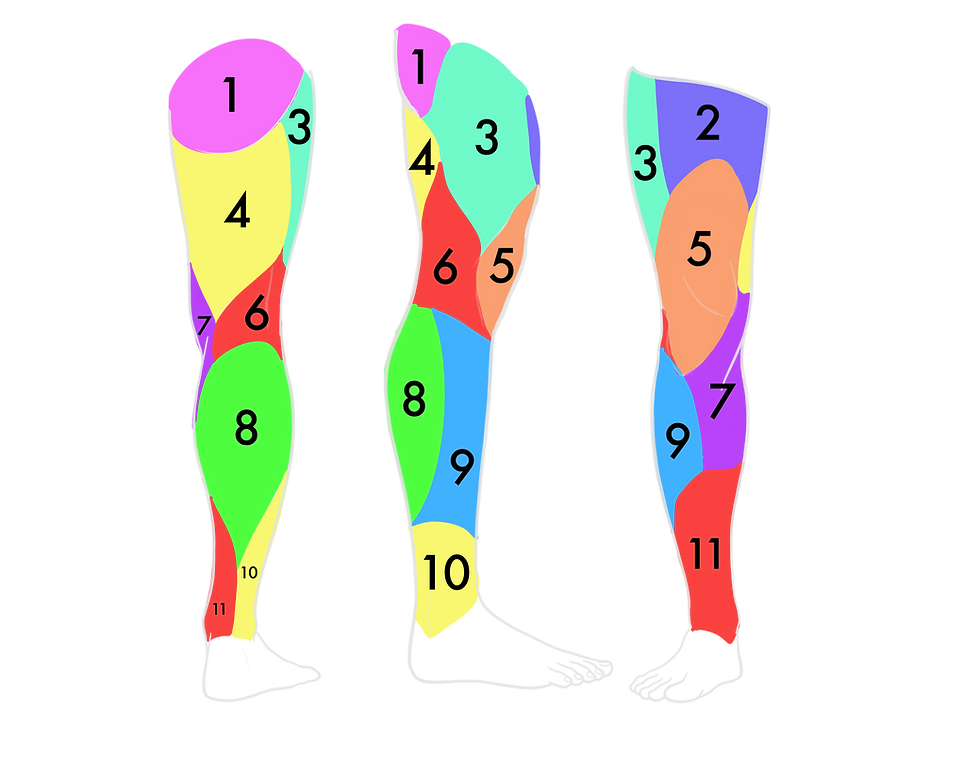
Leg sleeves cover a lot more ground than arm sleeves, which means more time and more sessions. Depending on the style and detail, you’re usually looking at around 10–15 sessions, as shown in the diagram below.